
Why a Powergrade Is the Smartest Way to Start Colour Grading in Da Vinci Resolve
If you have ever opened the colour page in Da Vinci Resolve for the first time, you will know the feeling. Wheels, curves, HSV qualifiers, a blank node tree staring back at you, and no idea where to begin. I have been there. Every photographer who picks up a camera and starts shooting video eventually hits this same wall, and most give up long before they work out what any of it actually does.
Here is the shortcut nobody tells you about. You do not need to learn colour theory from scratch before you can grade a shot that looks good. You need a powergrade.
What a powergrade actually is
A powergrade is a saved node tree you can drop straight onto any clip in your timeline. Think of it as a starting point rather than a finished look. A LUT is baked in, more like a sealed, ready made meal. You cannot see inside it, and adjusting one part usually means unravelling the whole thing. A powergrade is completely open, more like a recipe with every ingredient still on the counter. Every node is visible, every adjustment is labelled, and you can click into any single step and change it.
That openness is exactly why it is such a good place to start.
Why building on someone else's node tree beats starting from zero
My own grading workflow is built the same way every single time. A Rec709 conversion node sits at the base to get the colour space right, then exposure, white balance, contrast and HSV adjustments sit on top of that in order, with parallel nodes running alongside for finishing touches like vignette and glow. None of that is a secret or a trick. It is just a logical order of operations, saved so I never have to rebuild it from a blank timeline again.
When you start from a structure like this instead of an empty node tree, three things happen.
You can actually see how grading works. Turn the white balance node off and on and watch exactly what it does, then do the same for contrast, then HSV. That is a real lesson in colour, not a guess.
Your work stays consistent. Apply the same powergrade to every clip in a project and your video looks like it was shot and graded by one person with one clear style, rather than a different decision on every timeline.
You are free to break it. Because each node only does one job, you can turn any single one off, delete it, or push it further without wrecking the rest of the grade. That safety net makes it a low risk way to actually practise.
My free powergrade for Da Vinci Resolve
I built my own powergrade around exactly this structure, and I am giving it away for free. It is set up for Sony sLog3 footage out of the box, and if you are shooting on a different camera the only change you need to make is updating the CST IN and CST OUT nodes to match your camera's input colour space and gamma.
You can grab it here: Download my free Da Vinci Resolve Powergrade or by watching the YouTube Video here
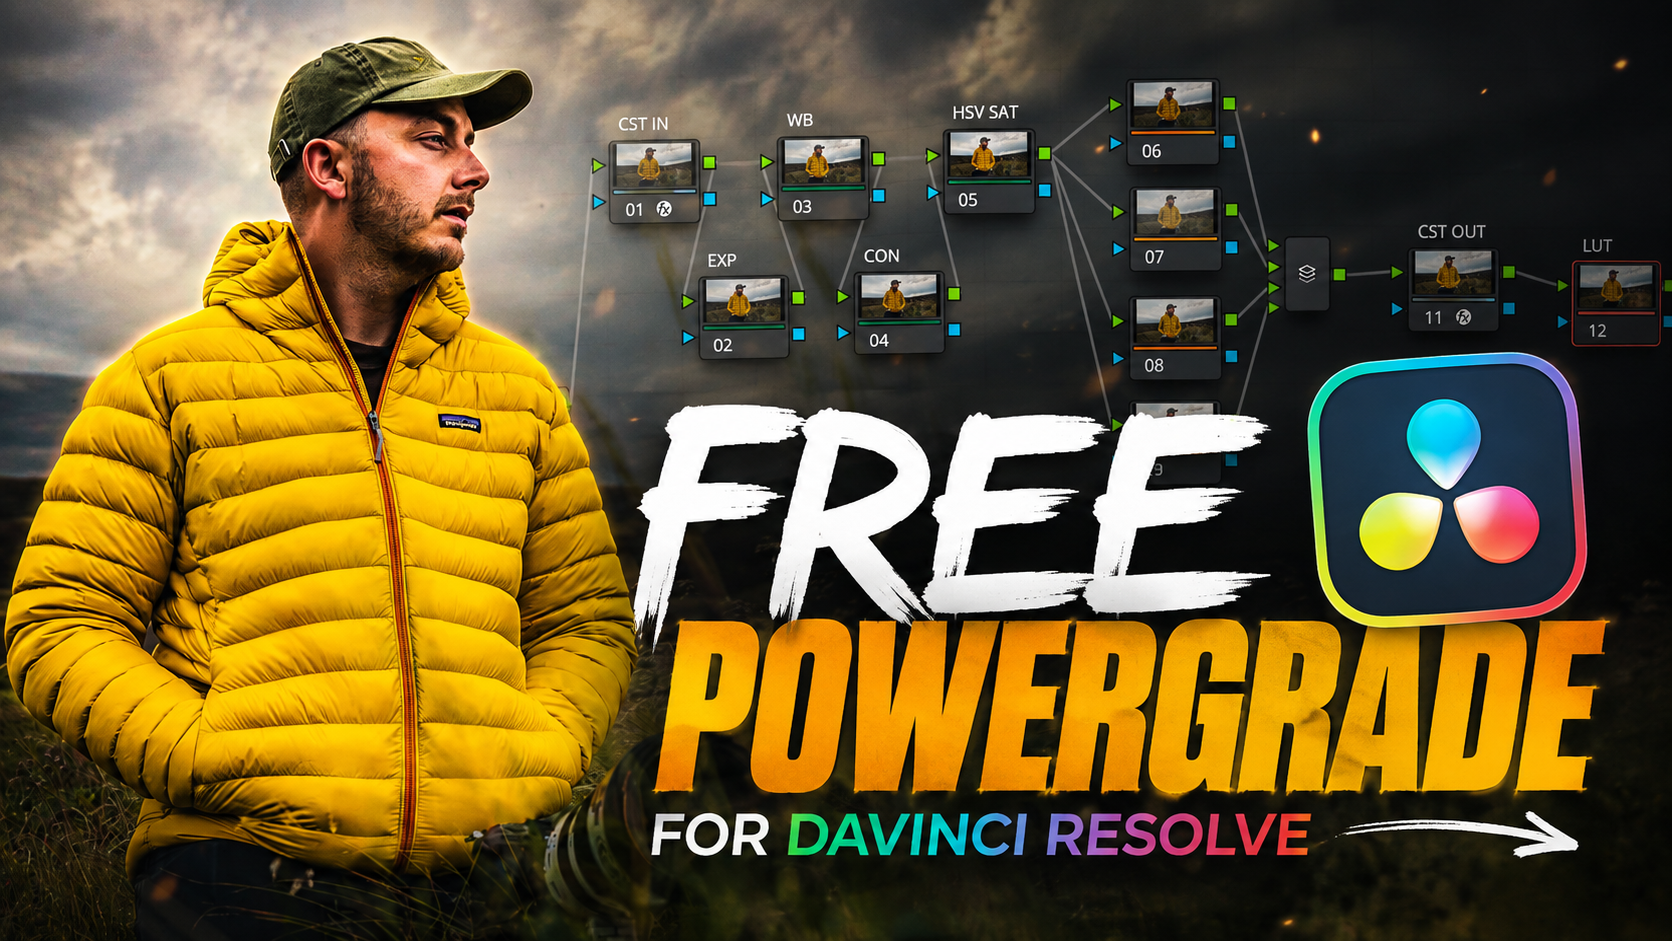
The PERFECT NODE TREE for you Colour Grading!
How to install it
Step one. Install the powergrade file into Da Vinci Resolve using the instructions below.
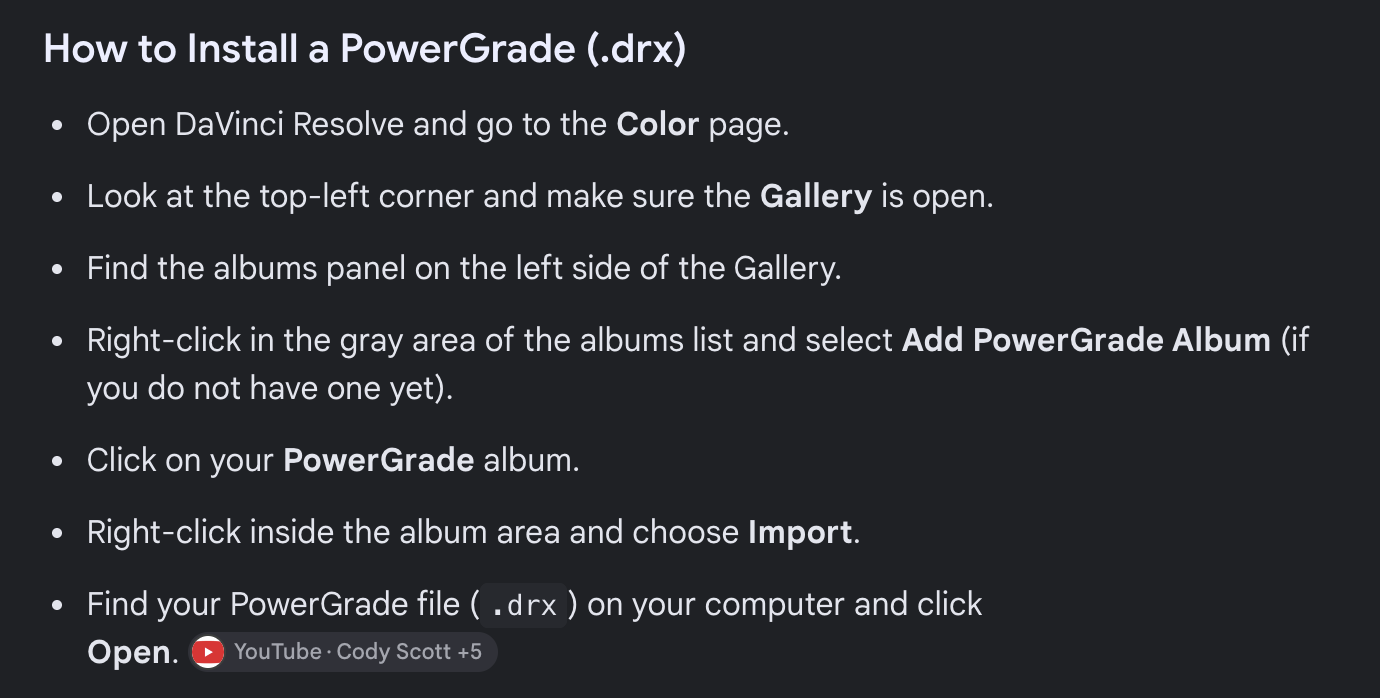
Install the powergrade file into Da Vinci Resolve using the instructions
Step two. Open Gallery, then Powergrades. You will see it sitting there ready to use. Drag it onto your node tree and the entire structure appears in one go
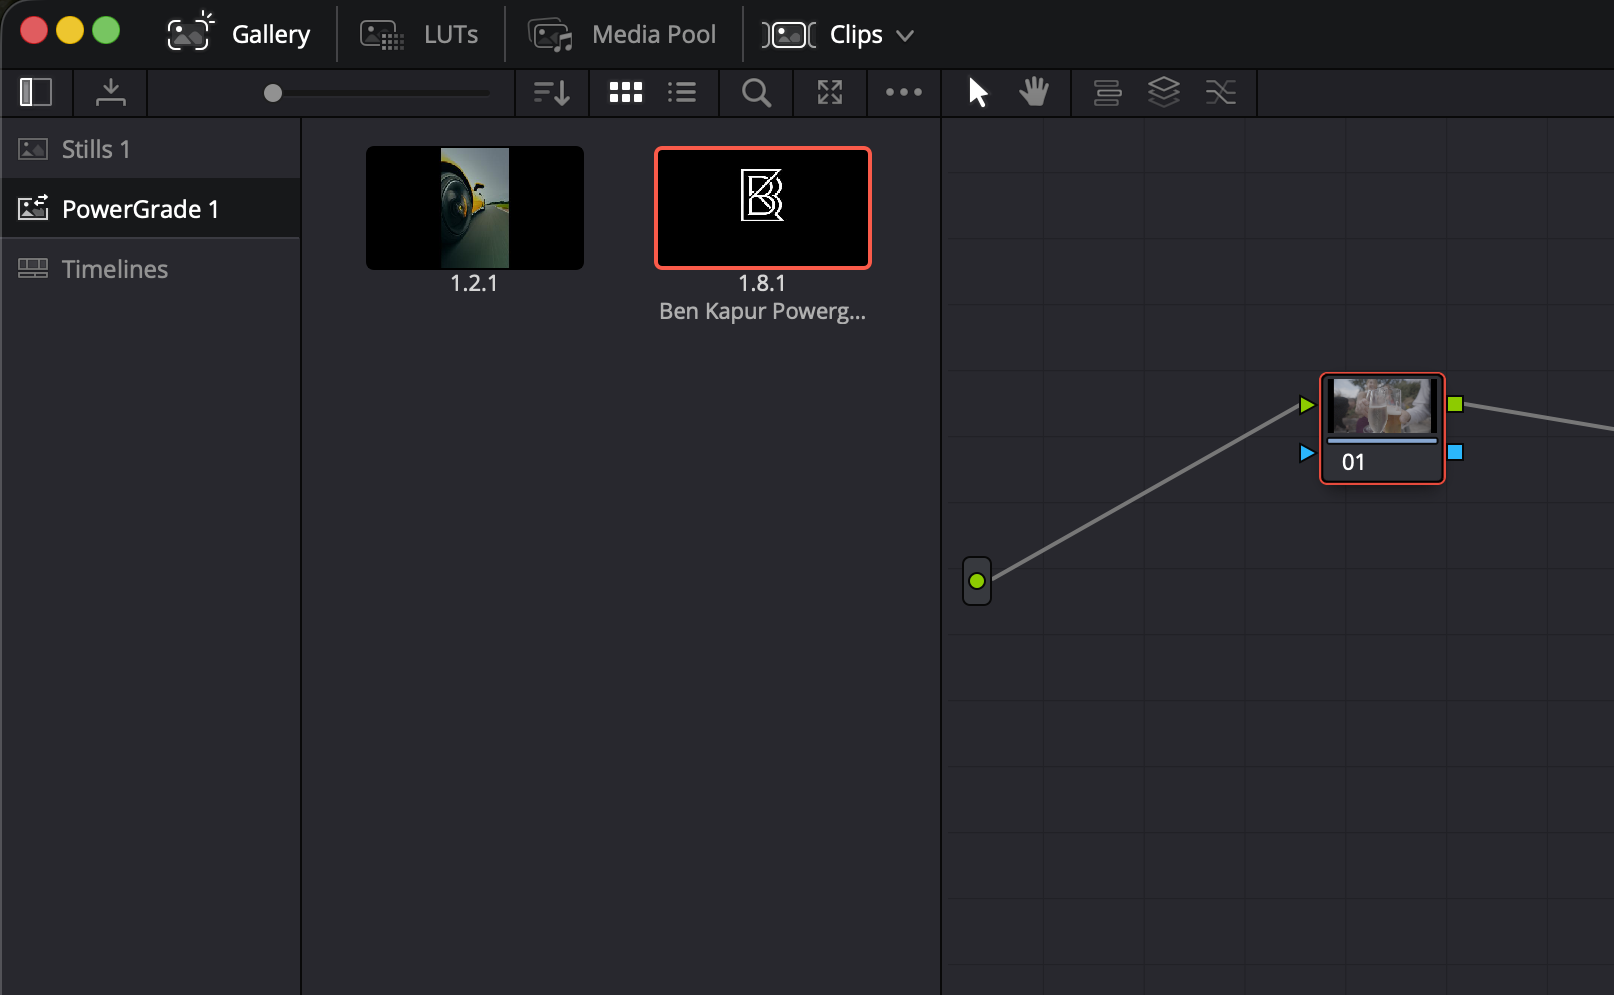
Open Gallery, then Powergrades. You will see it sitting there ready to use. Drag it onto your node tree and the entire structure appears in one go
Step three. Your node tree is built and ready to use, in full, exactly as shown.
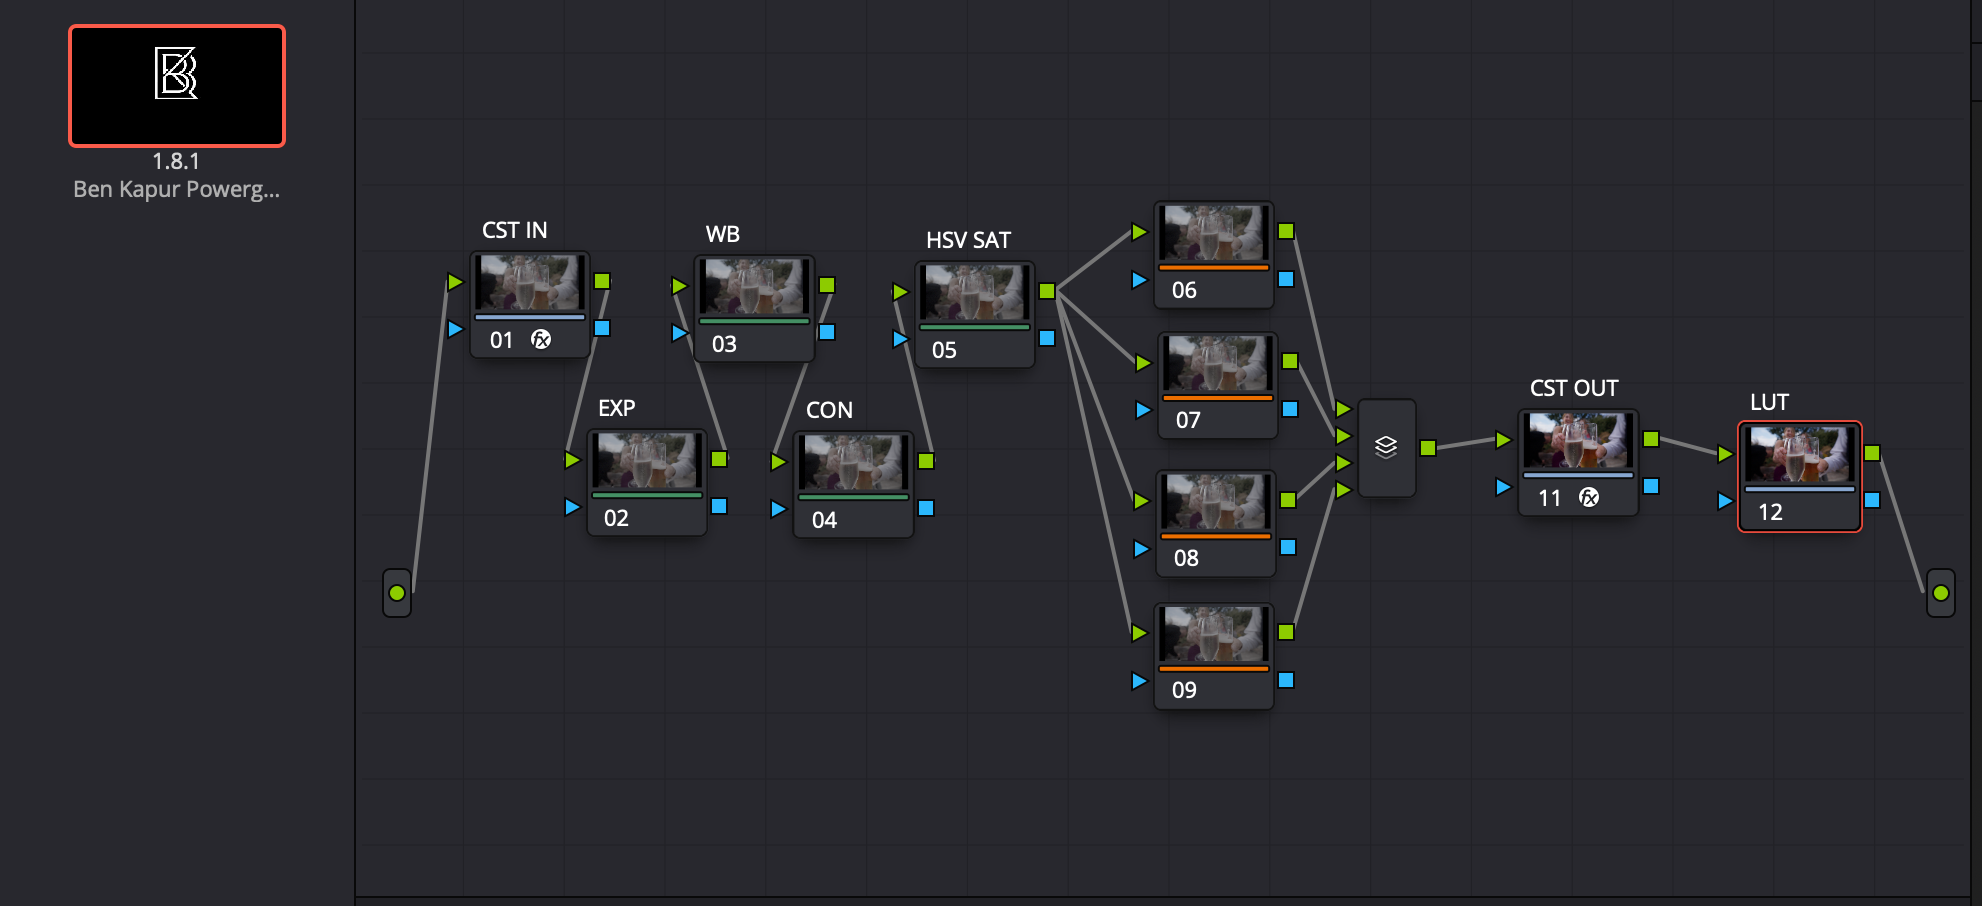
Ben Kapur Powergrade Node Tree
Step four. If you are not shooting Sony sLog3, open the CST IN node and change it to match your camera's input colour space and input gamma.
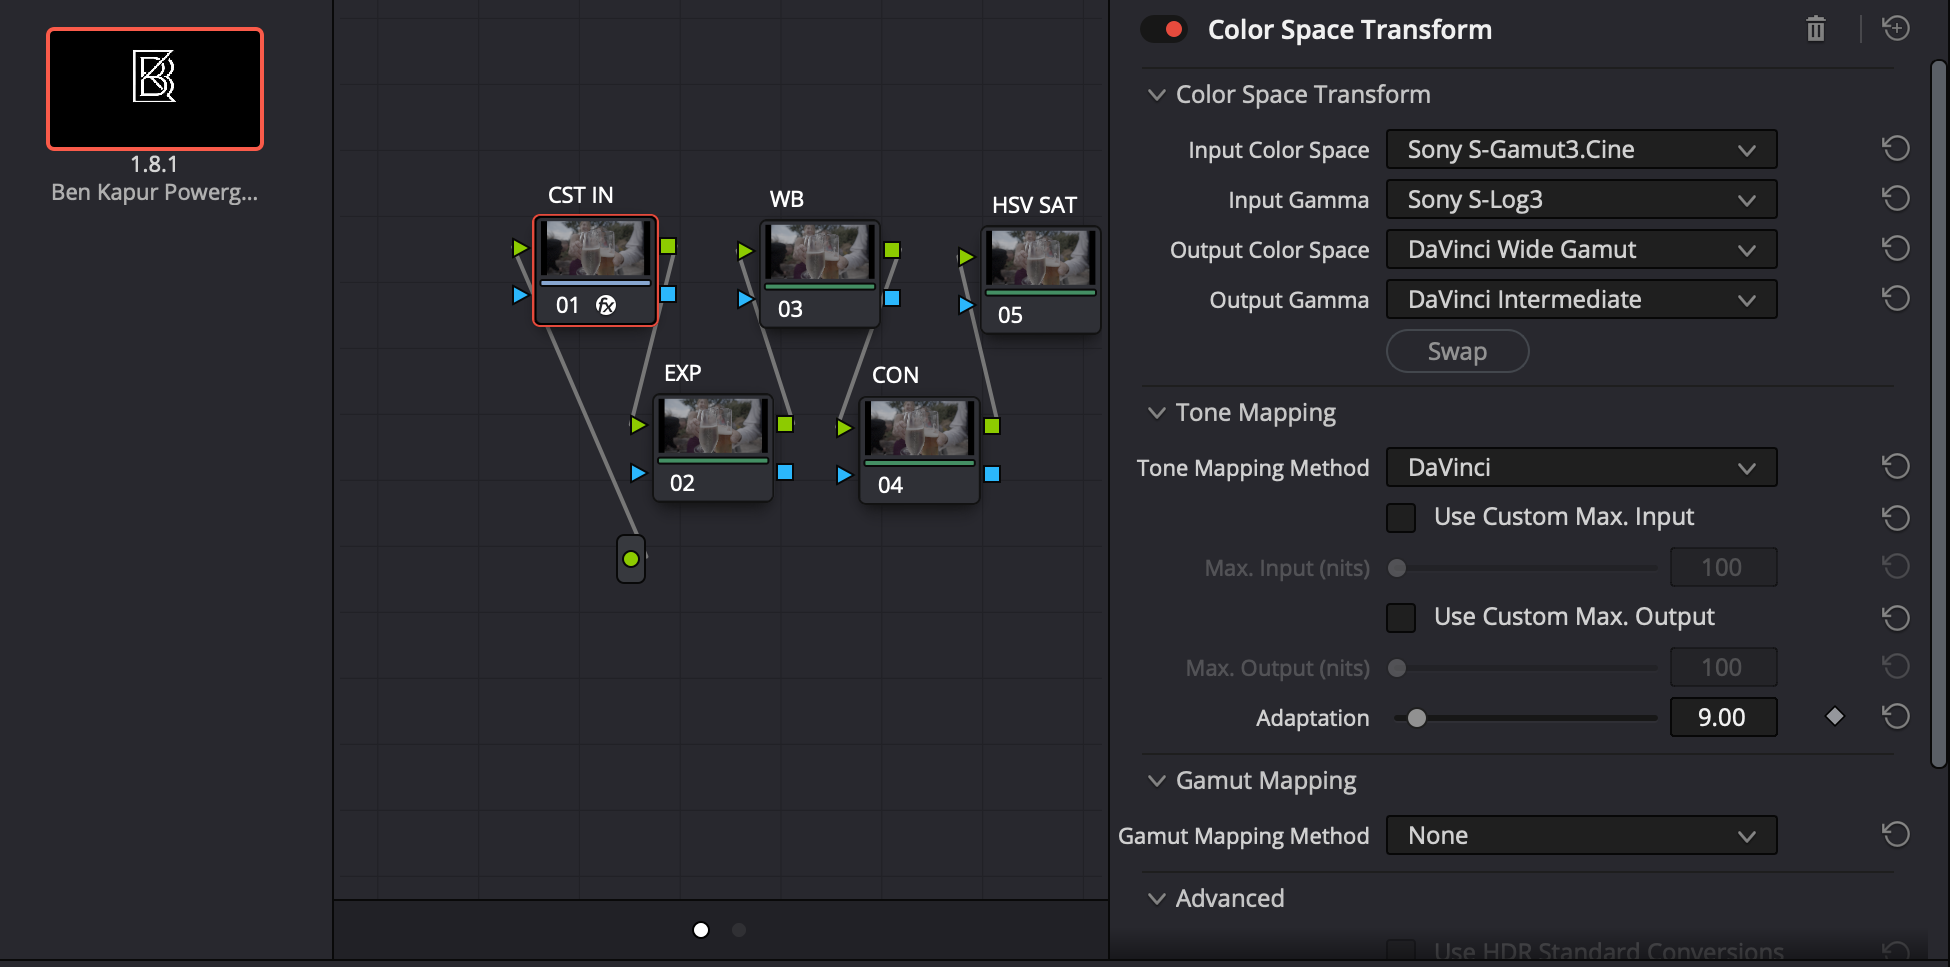
Change CST IN for other Log footage from other cameras
That is genuinely it. Five steps and you have a proper, professional node structure sitting on your footage, built the same way mine is built on every project I deliver.
Where to go from here
Download the powergrade, drop it onto a clip, and spend an evening switching nodes on and off to see what each one is doing. That alone will teach you more about colour than any amount of reading.
If you are a photographer moving into video and want to go further than colour on its own, my course, From Photographer to Filmmaker, walks through the whole process from camera settings through to editing in Da Vinci Resolve, using skills you already have behind a camera.
