
I've finally done it. For a long time people have been asking me how I grade my footage, so I've packaged up three of the looks I use on my own work into a LUT pack for DaVinci Resolve. It's called the Ben Kapur Cinematic LUT Pack, and it includes three creative LUTs: CINE, CINE WARM and BAHA.
Every look in the pack is subtle. I didn't want to make LUTs that slap a heavy filter over your footage and take over the shot. These are the kind of looks that make your footage feel graded and filmic while still looking natural.
In this post I'm walking through all three looks with before and after examples, how they work with my free DaVinci Resolve Powergrade, and how to install them.
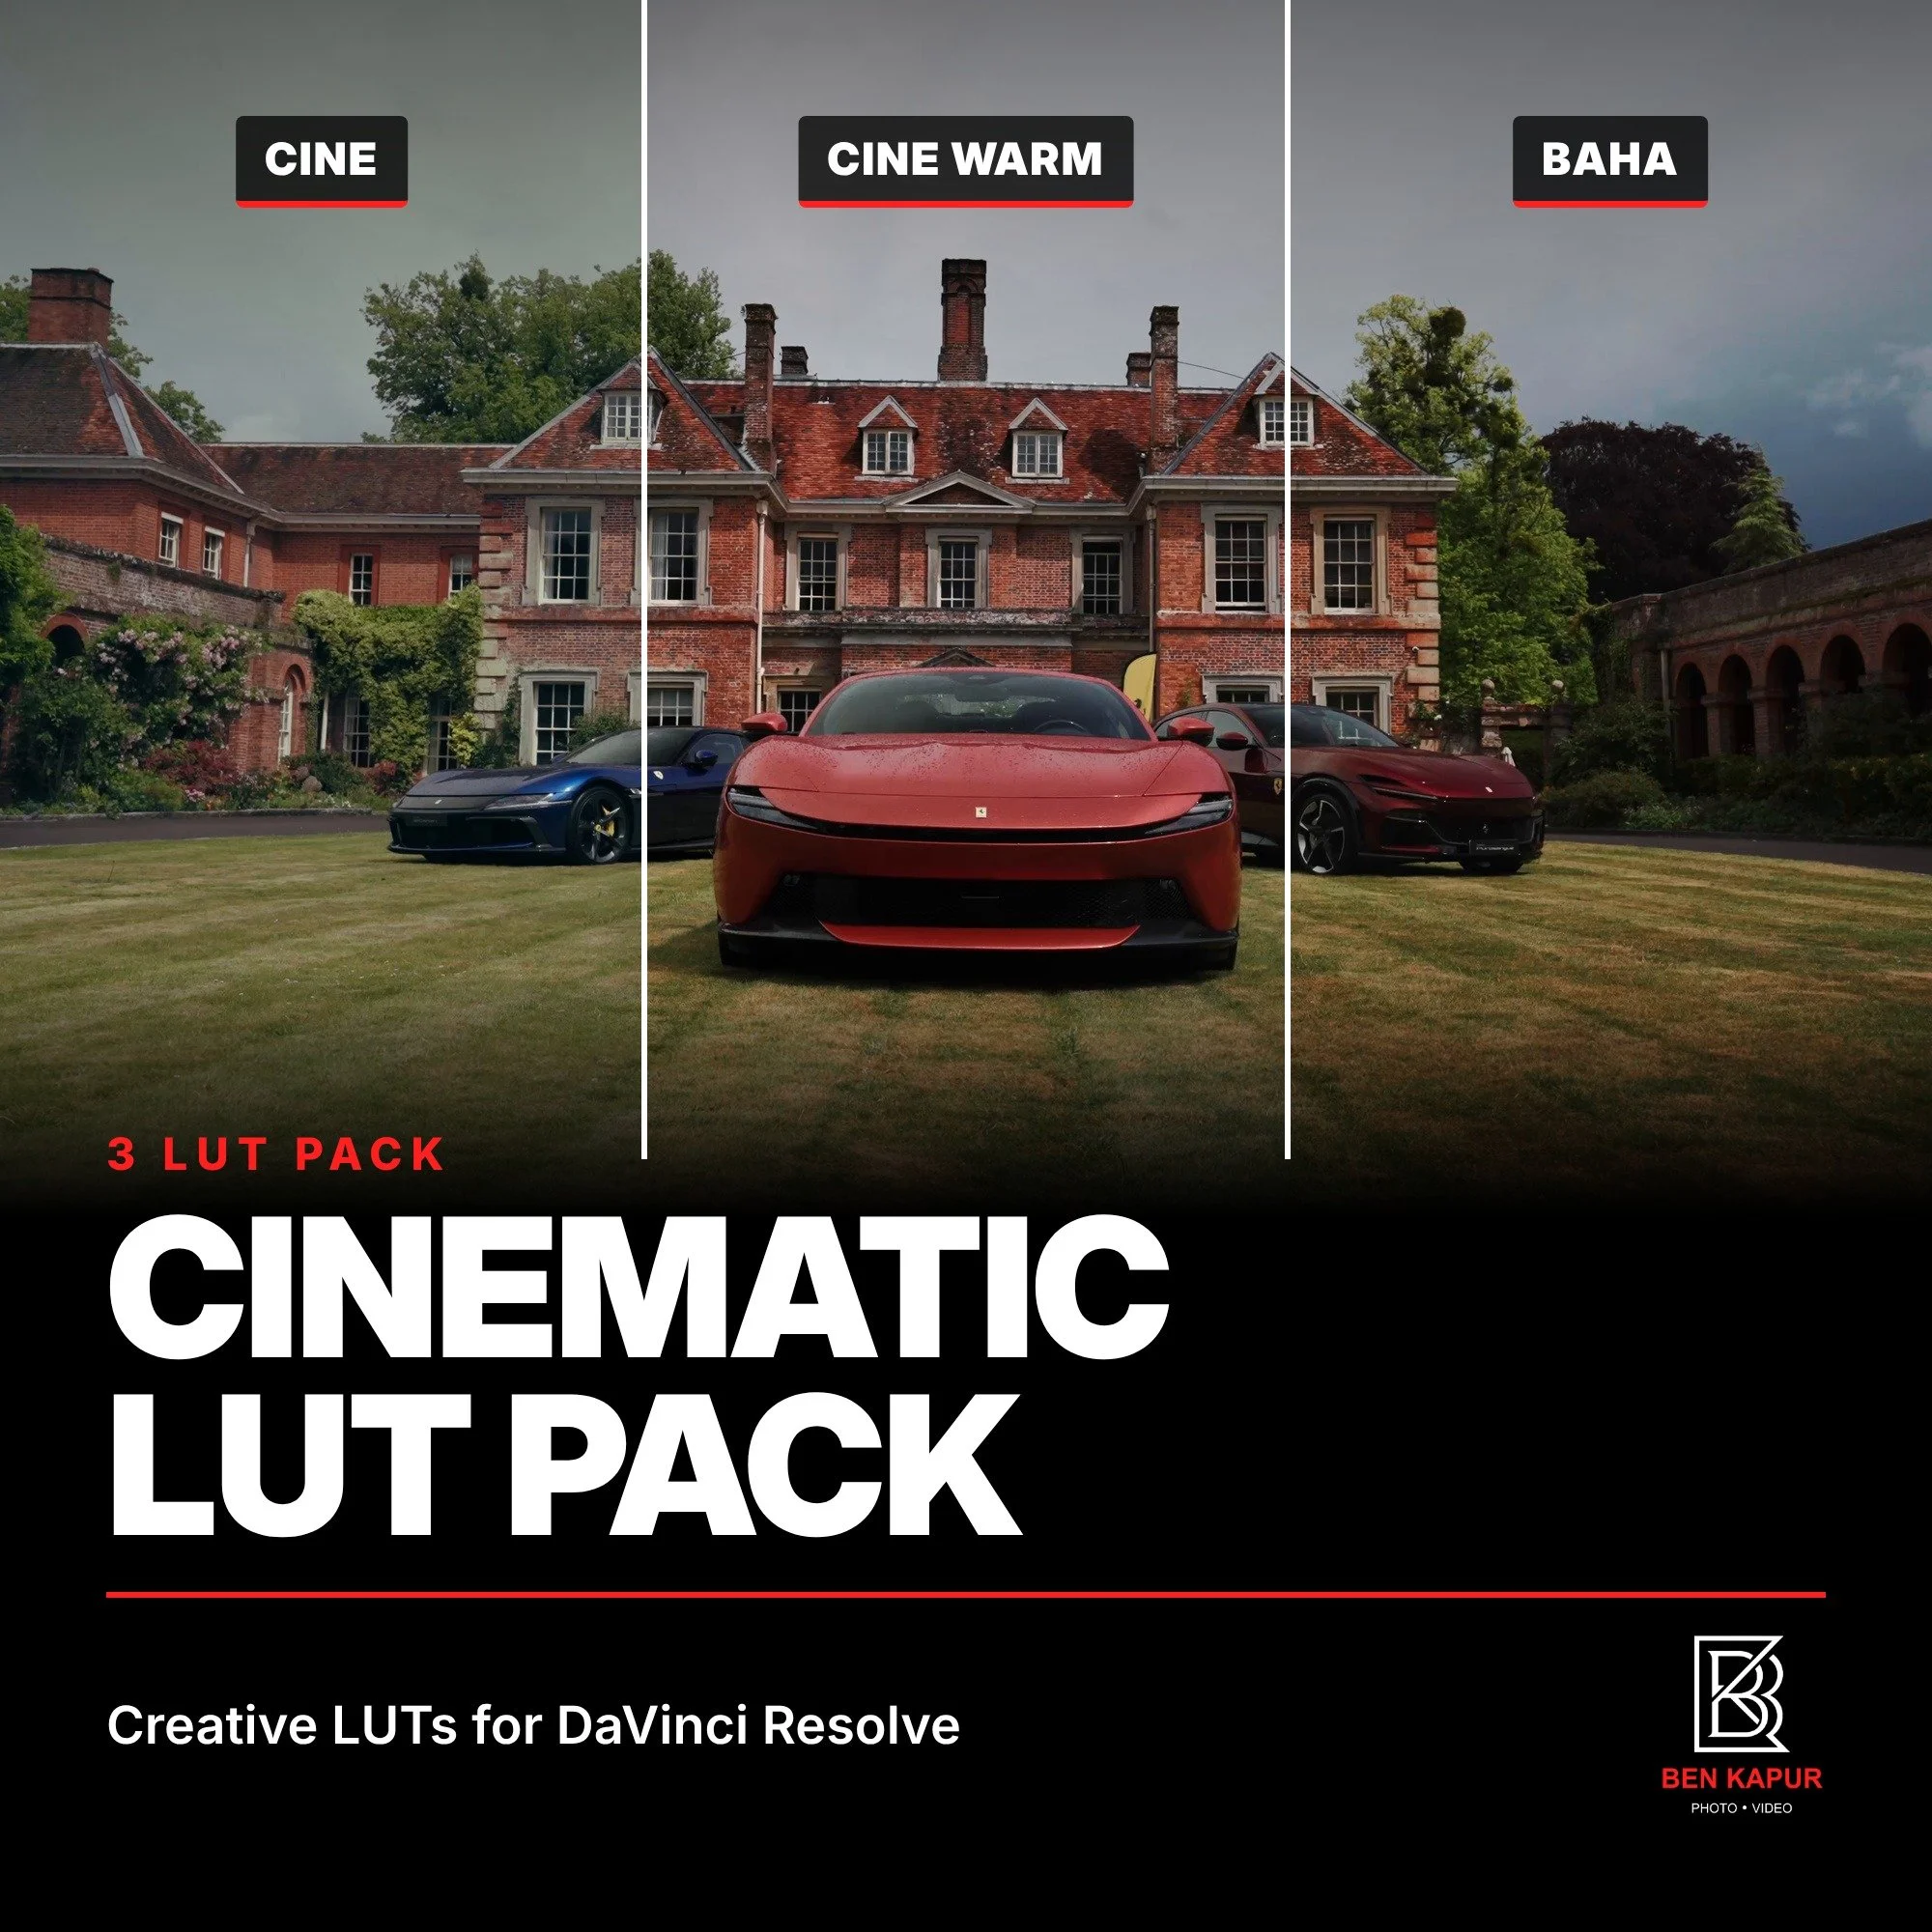
What's in the Cinematic LUT Pack
CINE: my most subtle look
CINE WARM: a warmer, richer take
BAHA: the punchiest of the three
A step by step PDF guide showing you how to install them in DaVinci Resolve
All three are .cube files at 33 point, so as well as DaVinci Resolve they work in Premiere Pro, Final Cut Pro and pretty much any editing software that supports LUTs. The full pack is £7.99.
Get the Cinematic LUT Pack here
CINE: My Most Subtle Look
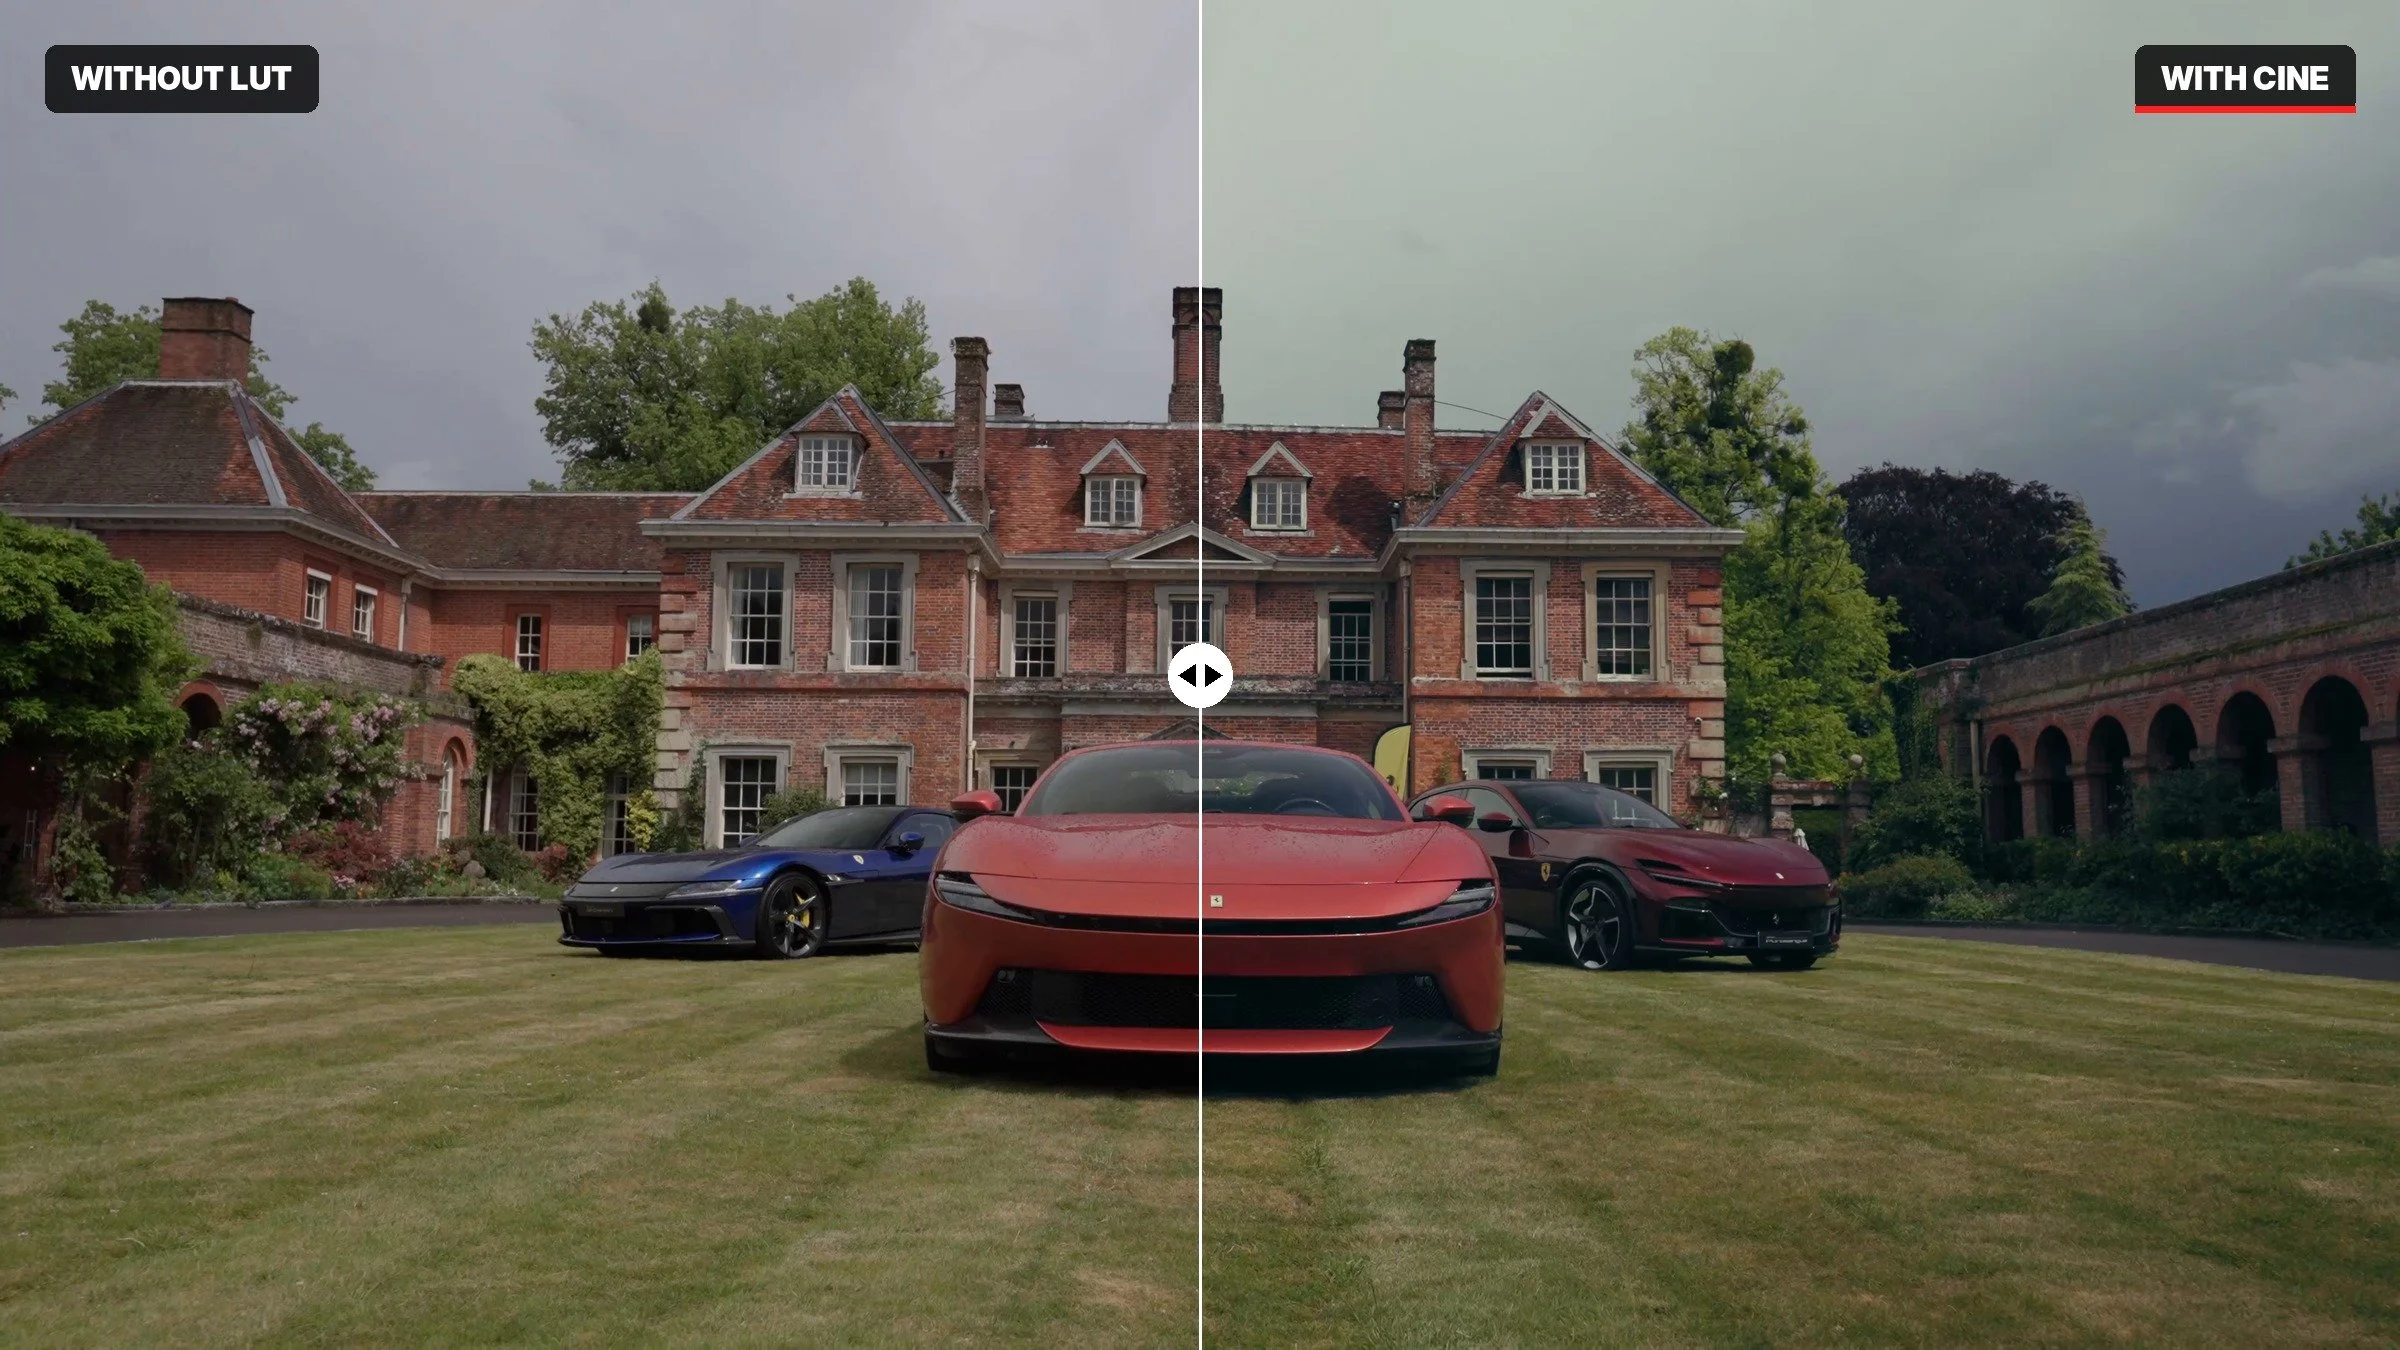
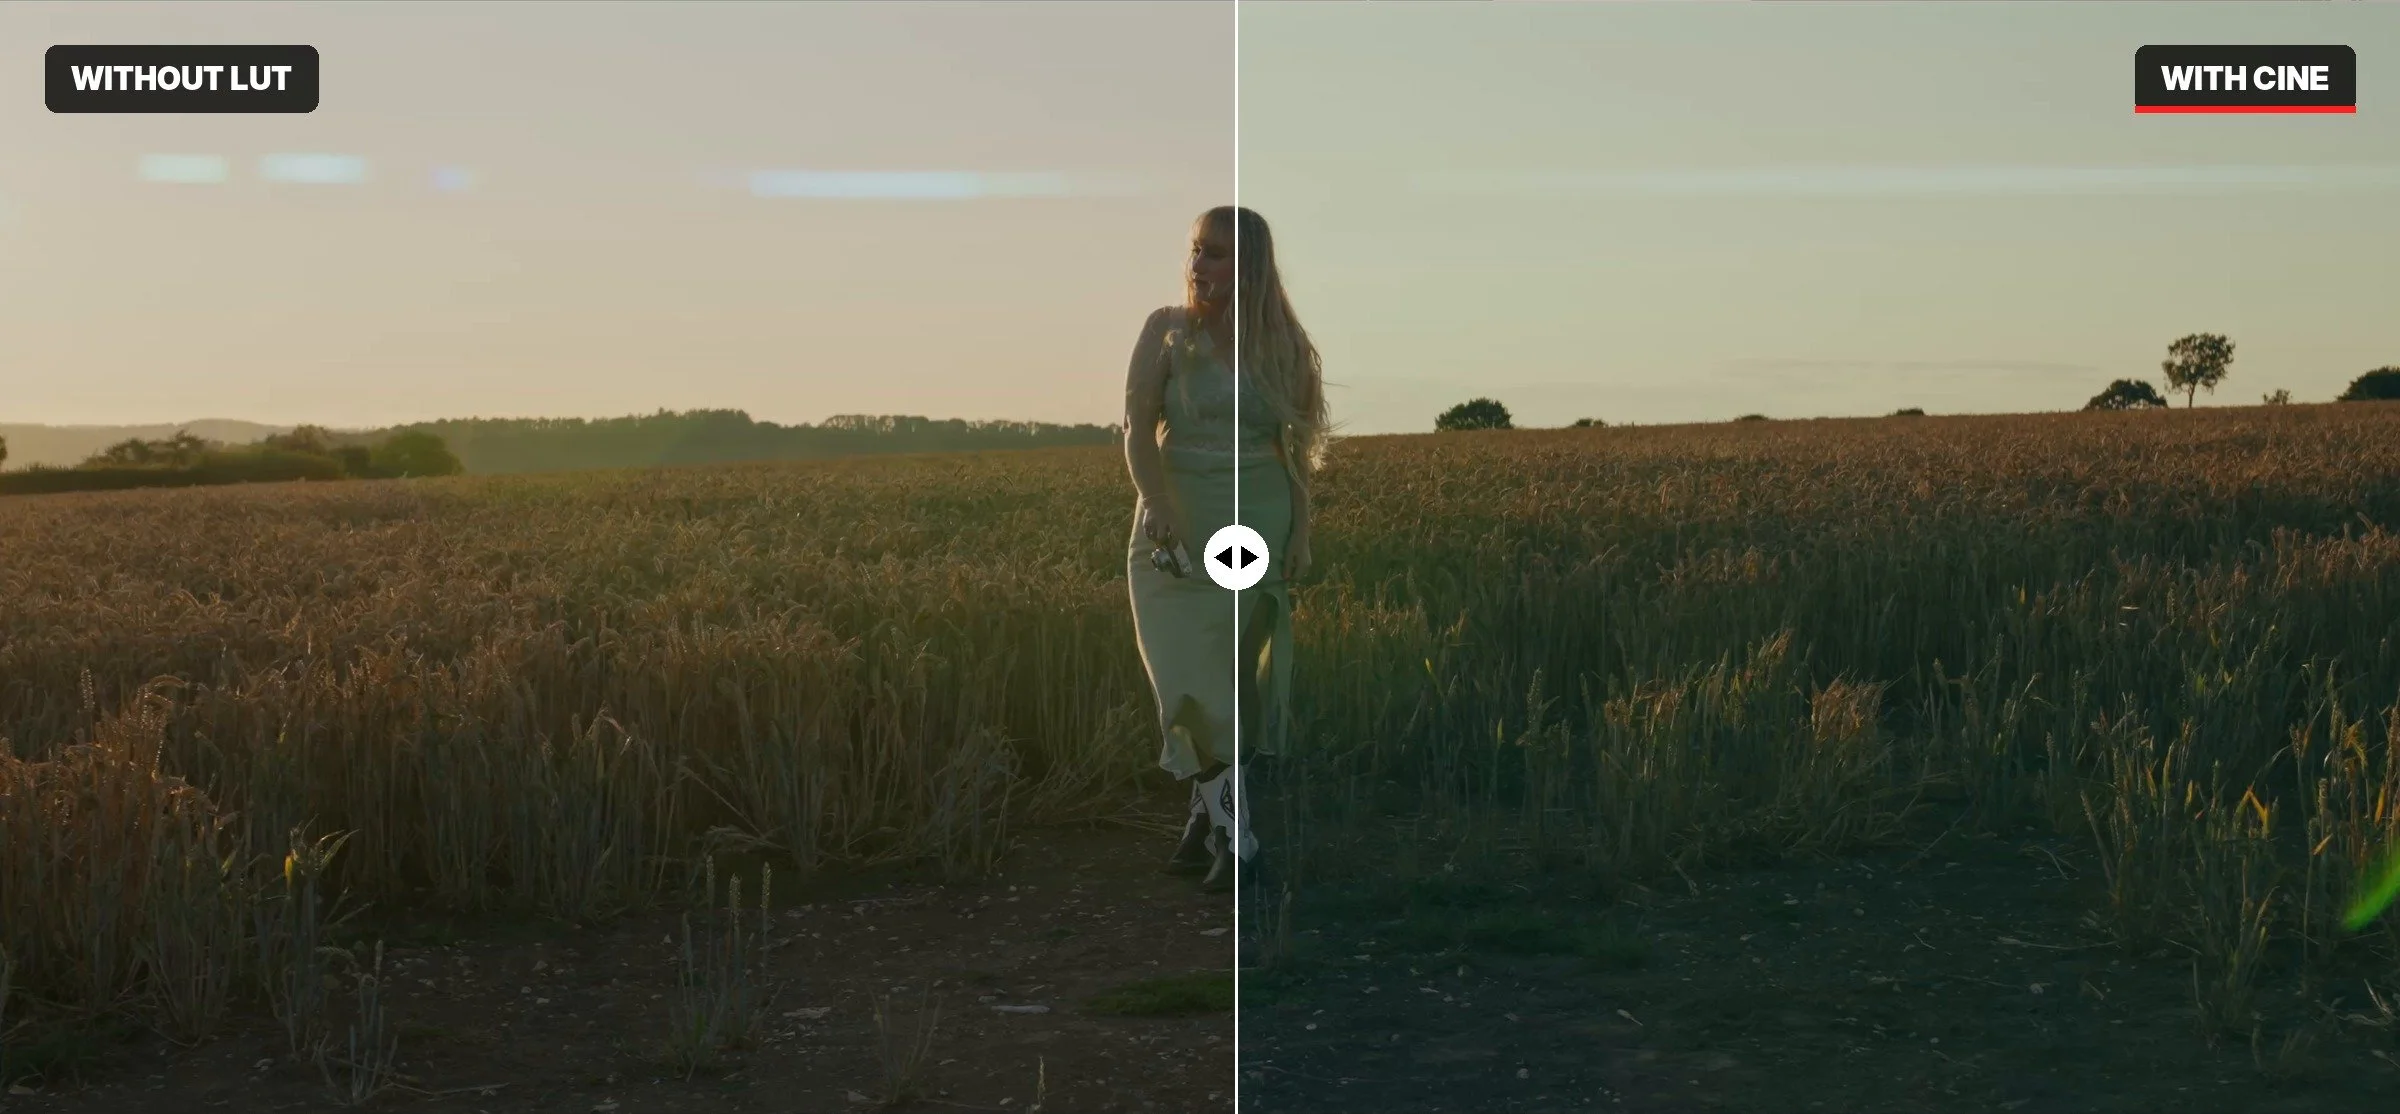
CINE is the look I find myself coming back to the most. It gently lifts the shadows with a soft cool tone, rolls off the highlights and keeps skin tones natural. If you want your footage to feel cinematic without anyone being able to point at the grade, this is the one.
CINE WARM: Warmer and Richer
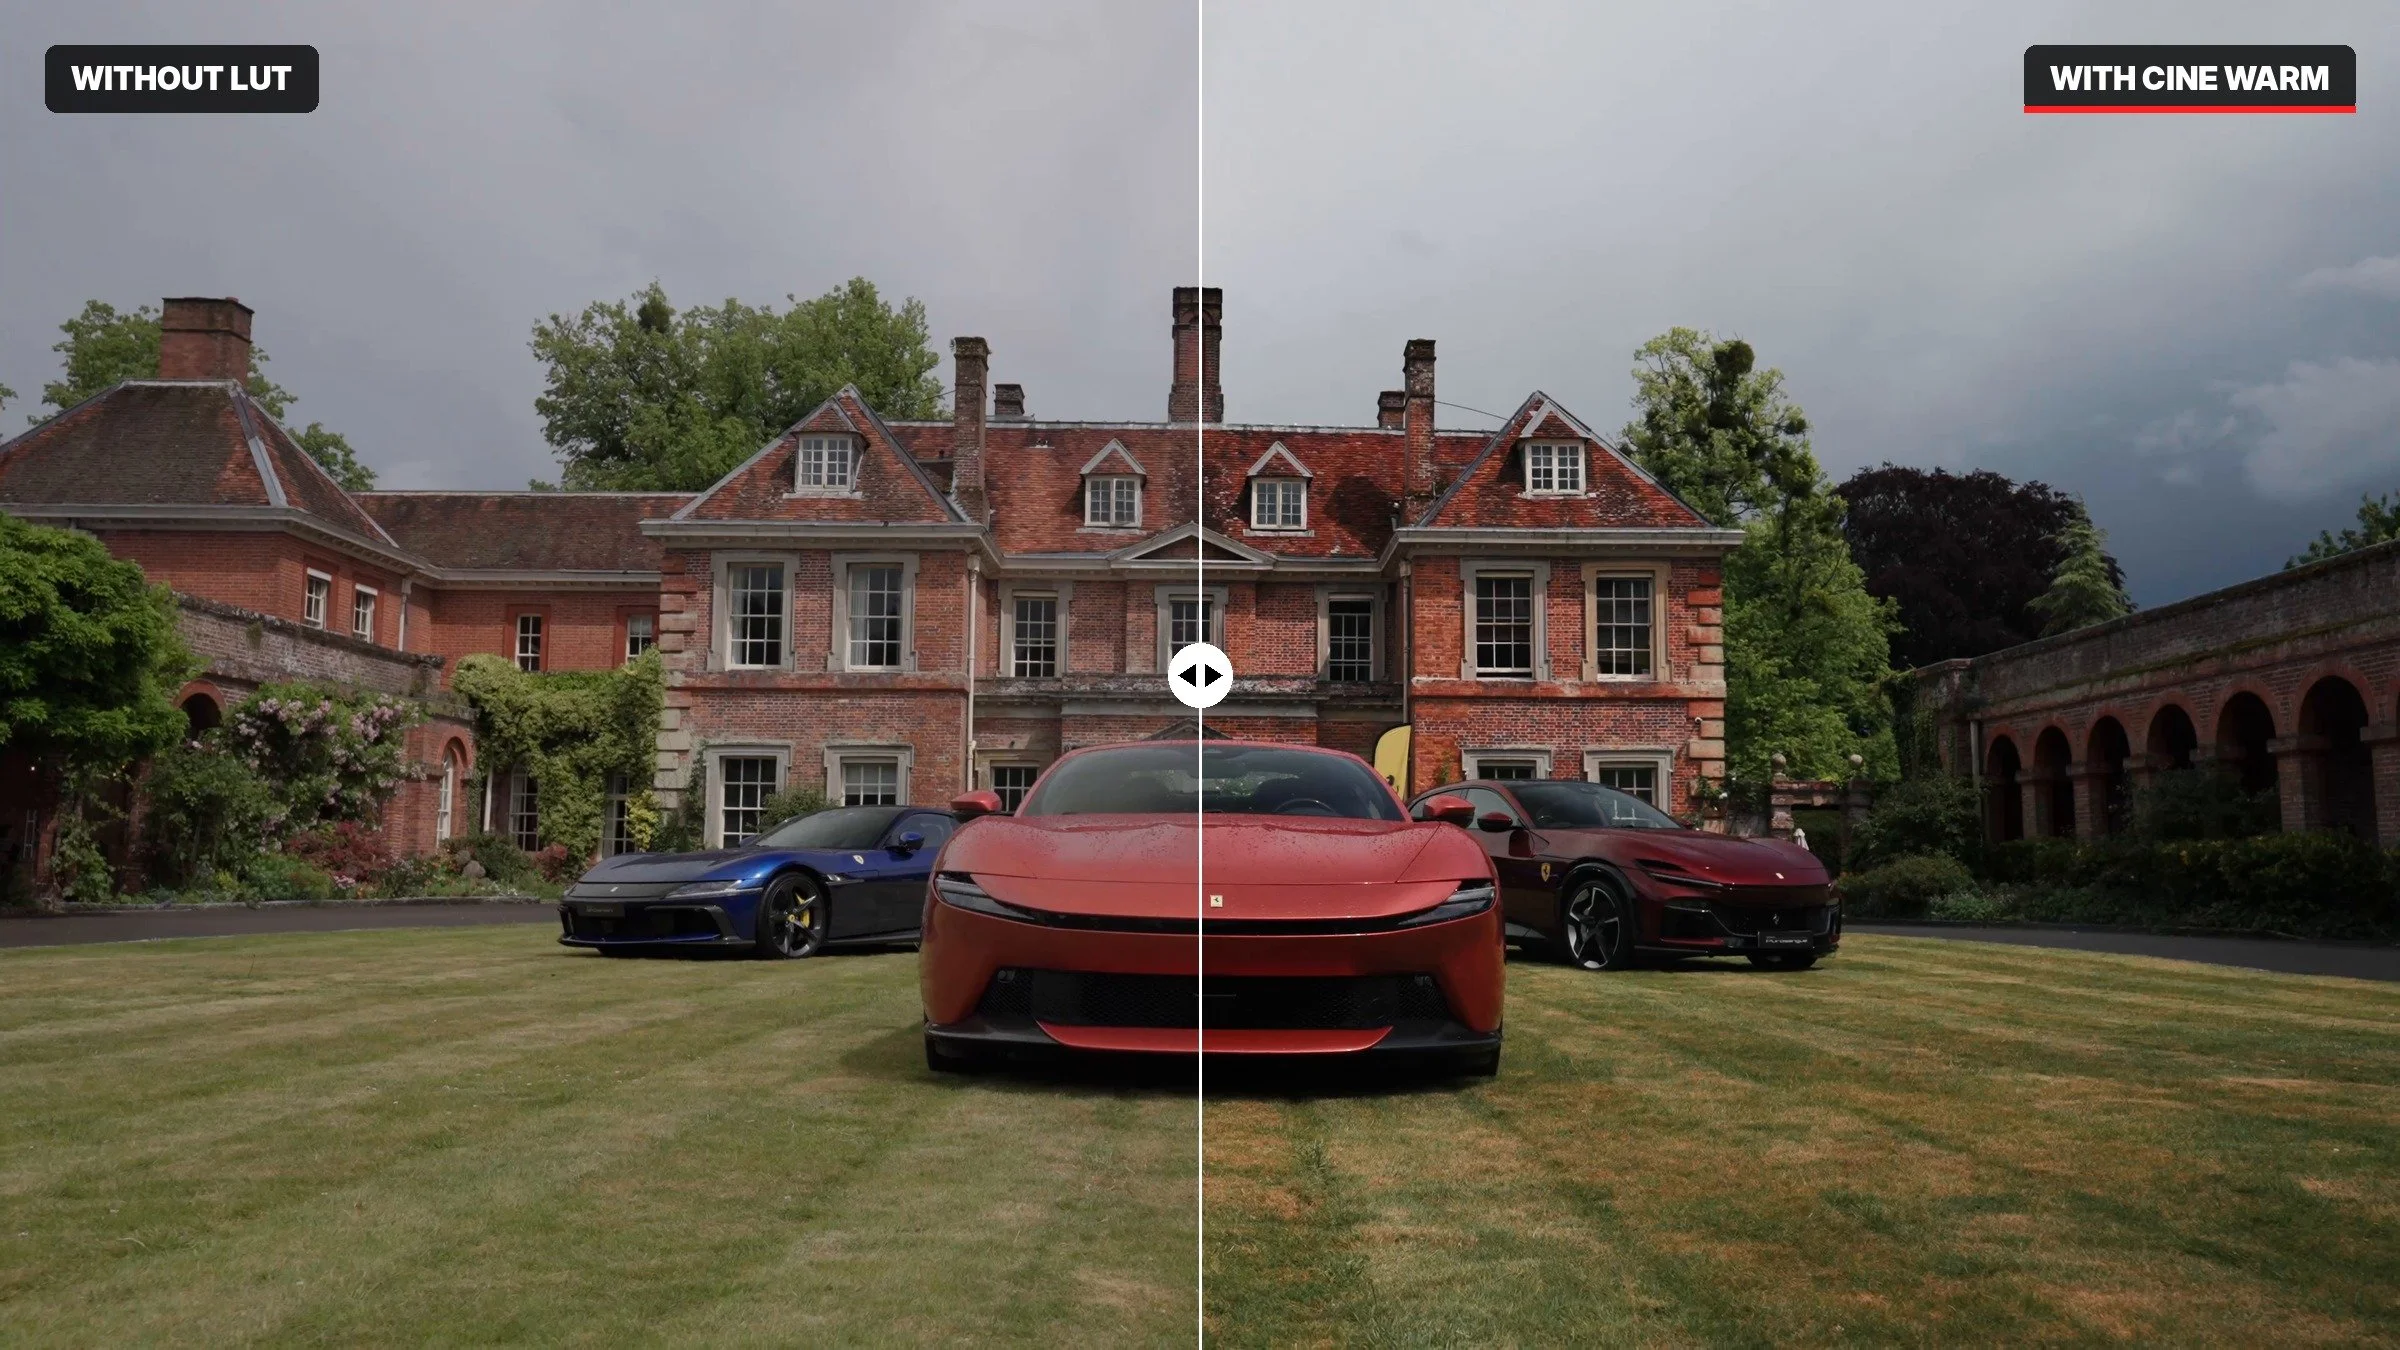
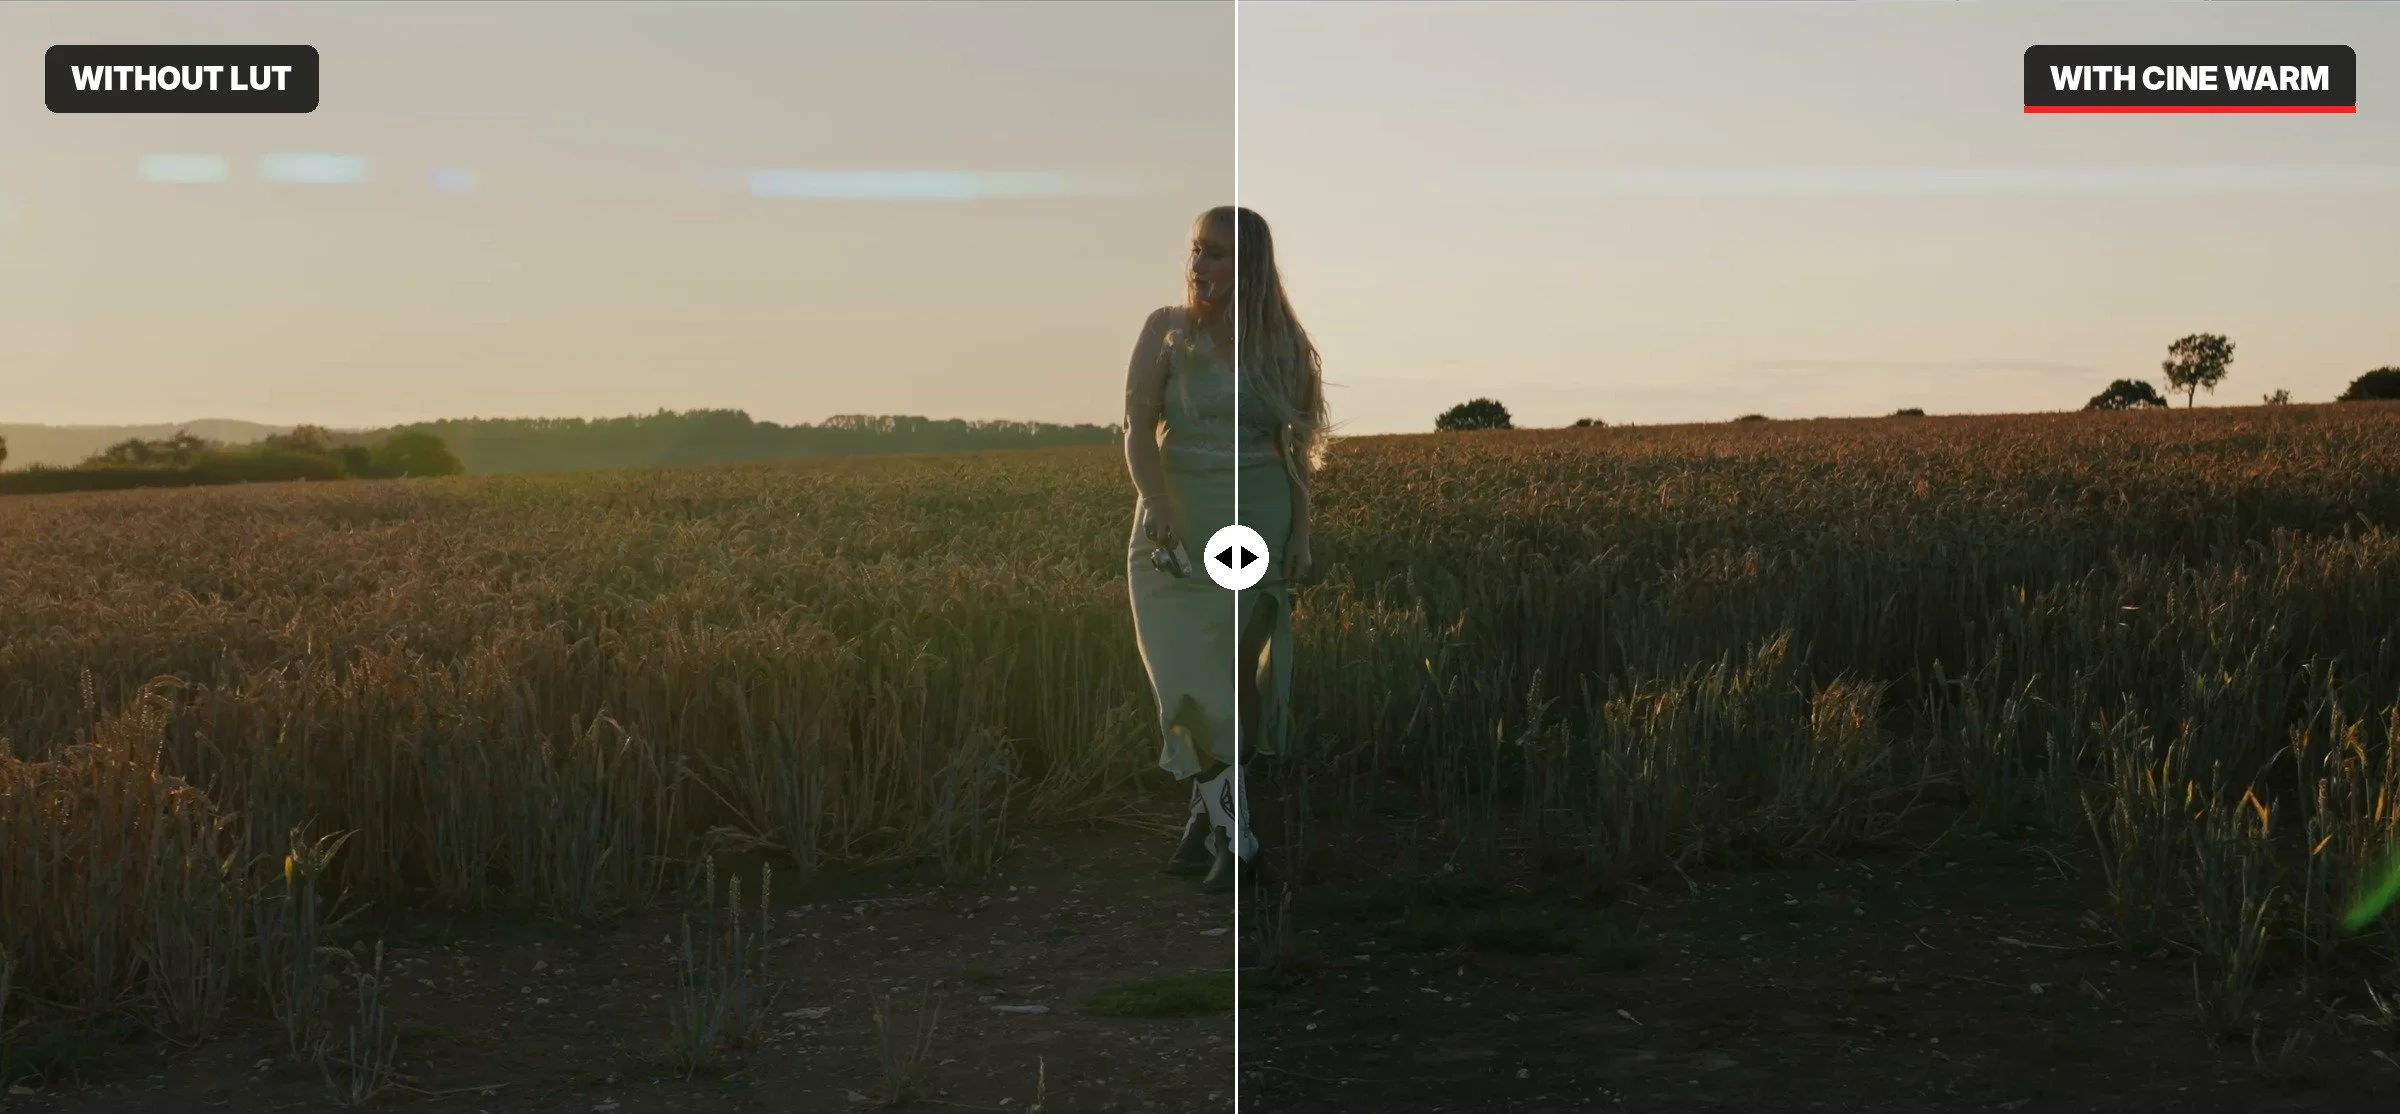
CINE WARM takes things in a warmer direction. There's a touch more contrast, warmer skin tones and a golden hour feel that works brilliantly on sunsets, portraits and anything shot in soft evening light.
BAHA: The Punchiest of the Three
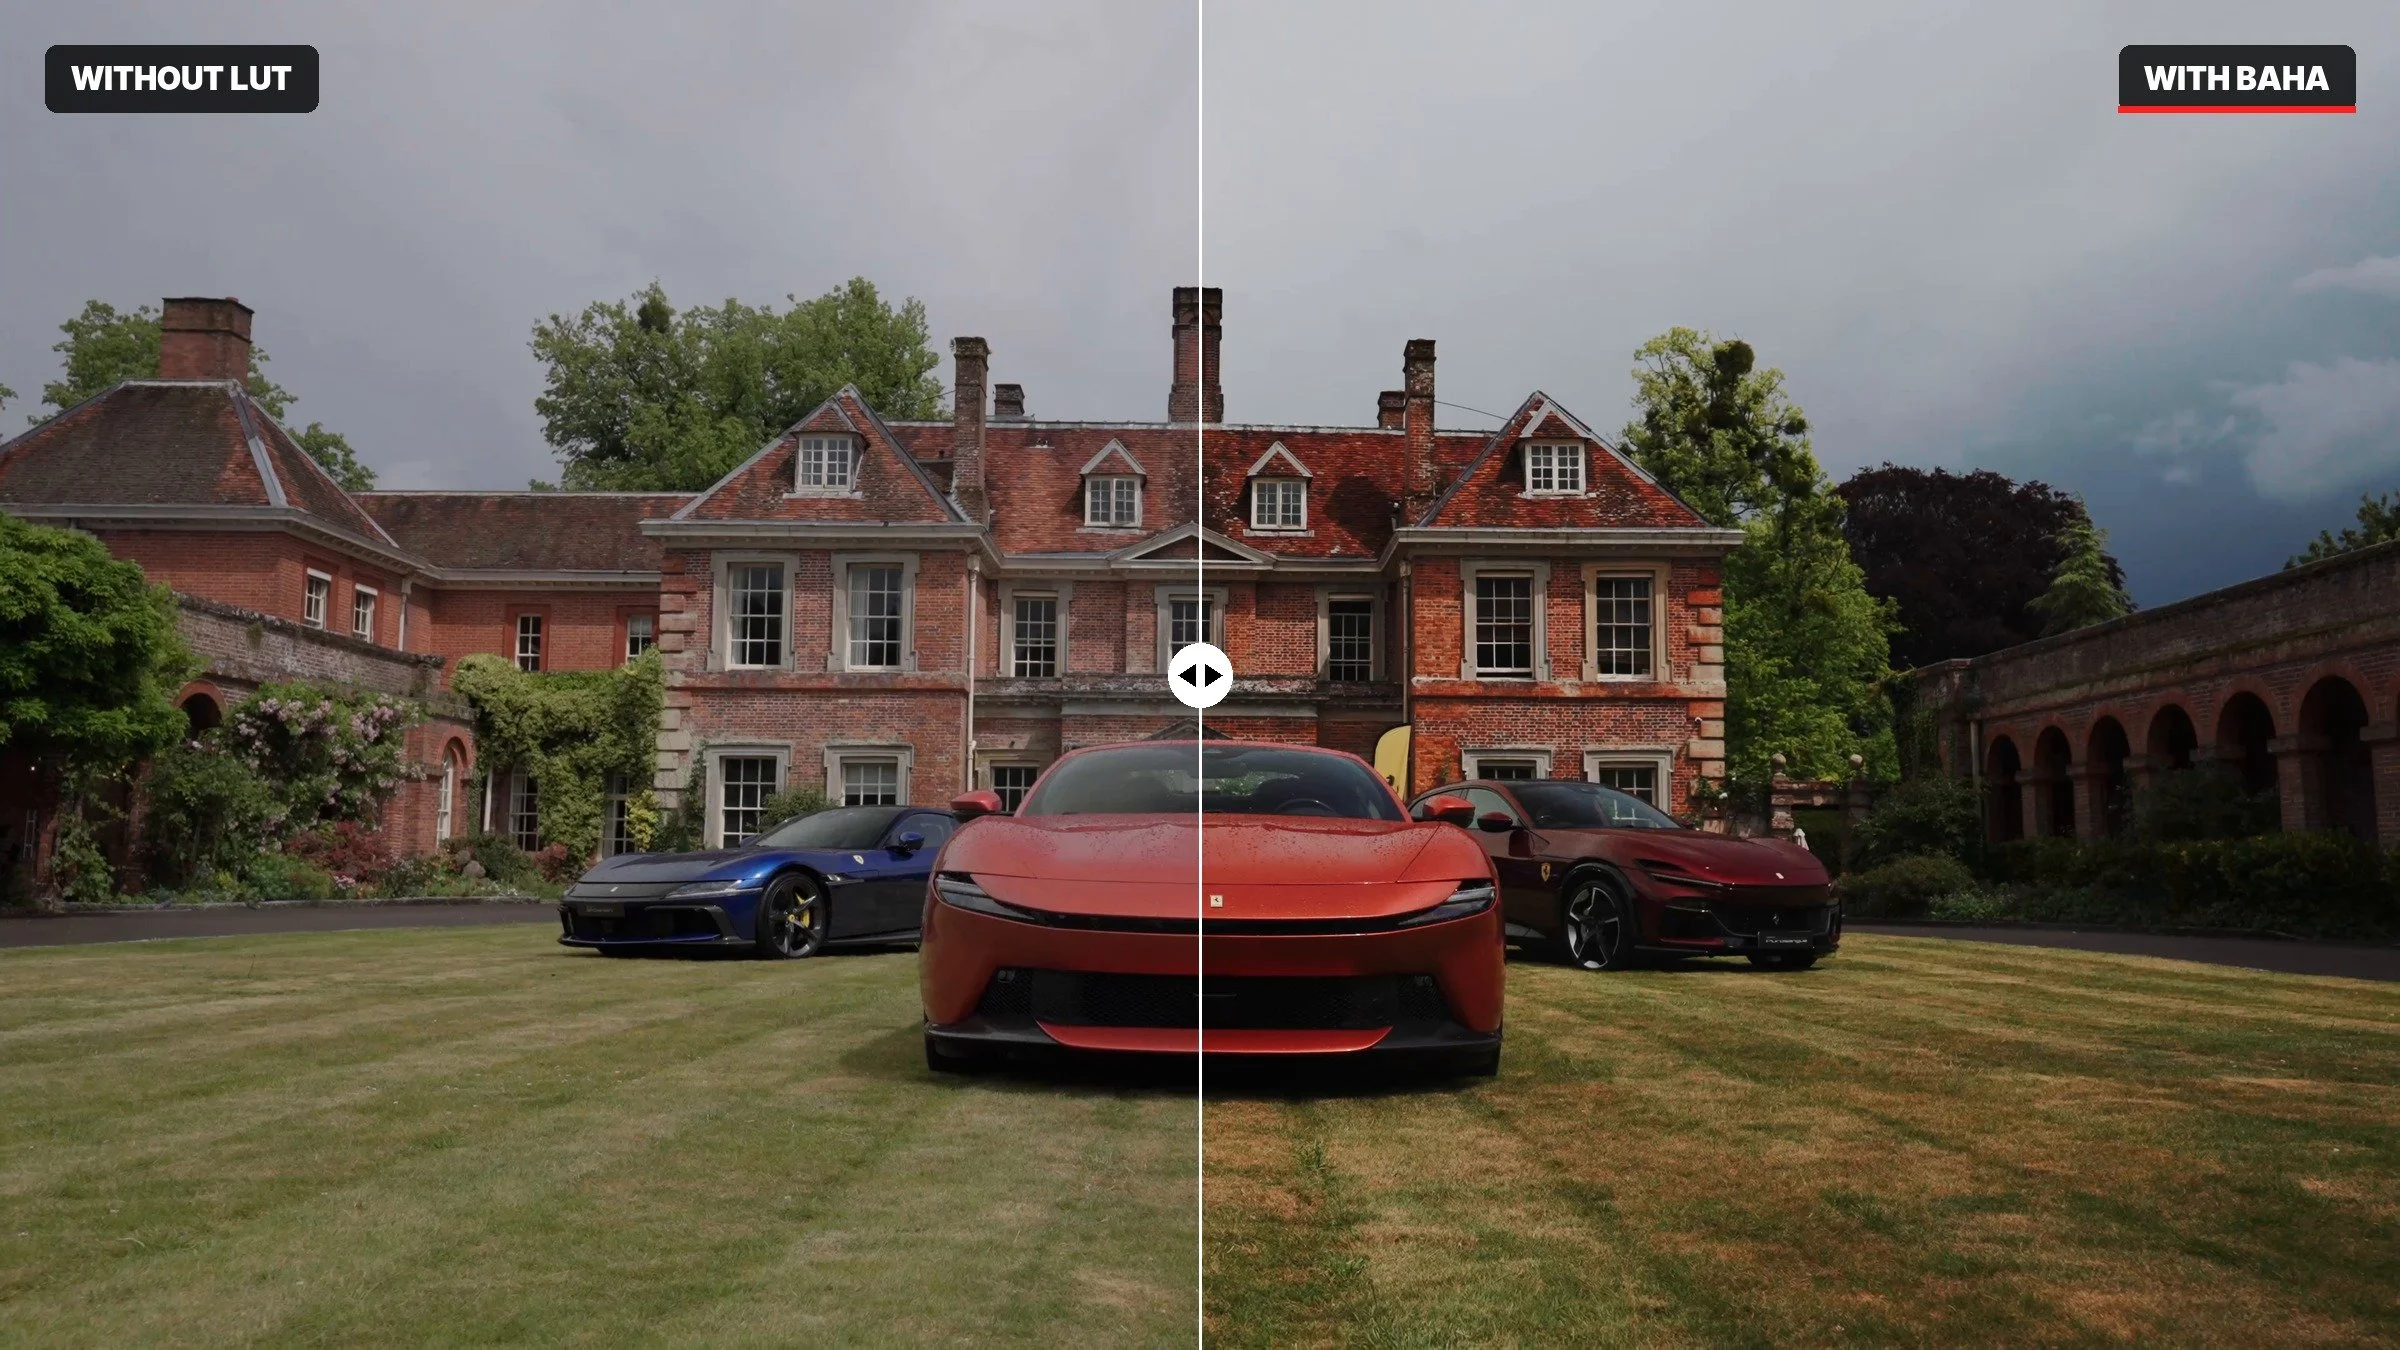
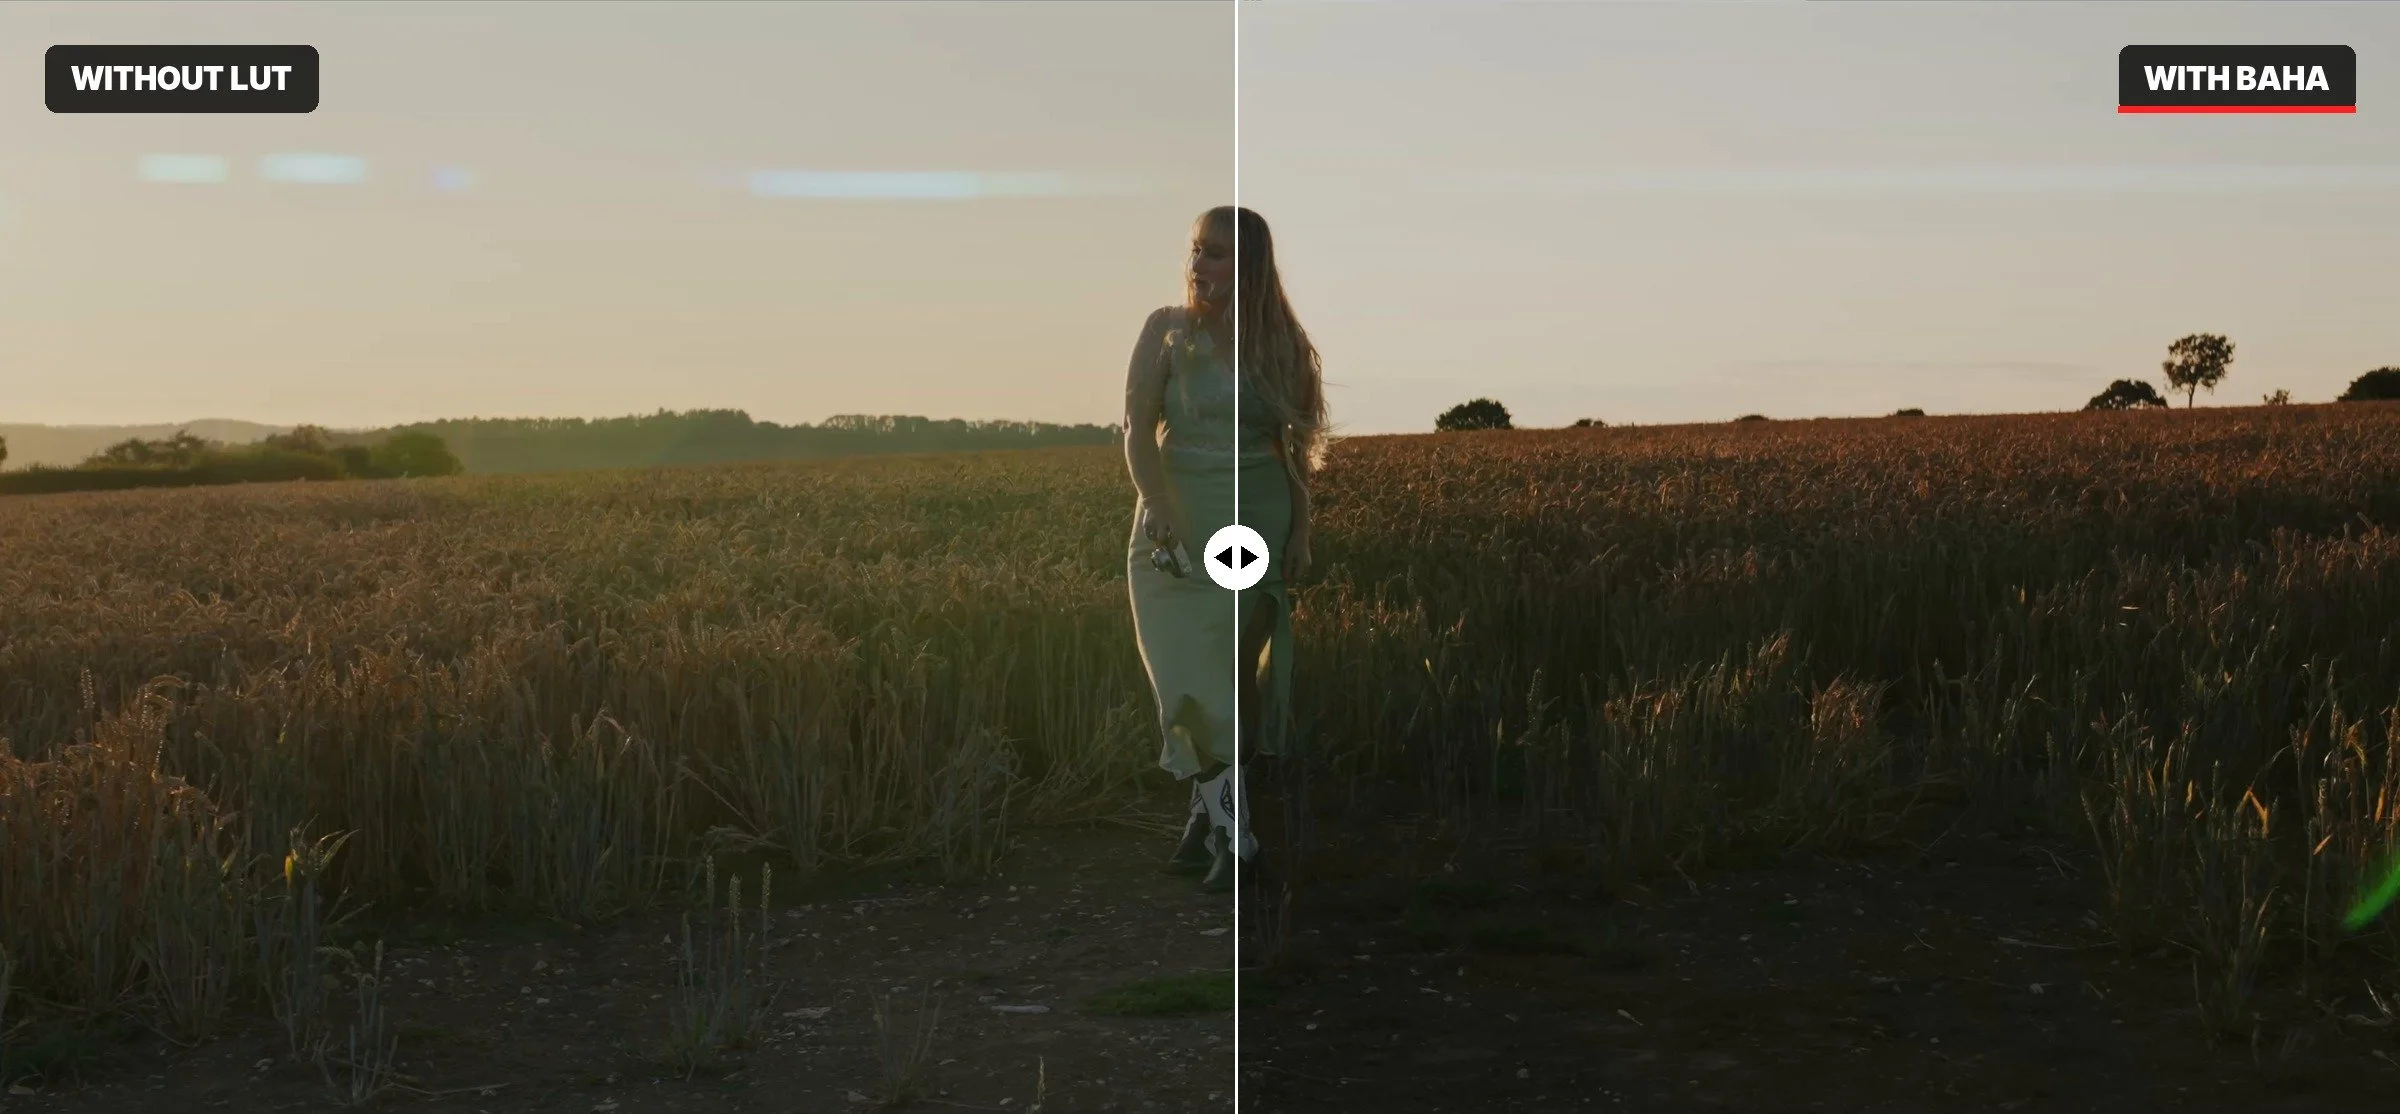
BAHA is the boldest look in the pack. It brings deeper contrast, rich greens and blues and softly rolled highlights. It still looks natural, but it has more punch, which really suits cars, landscapes and anything where you want the colour to stand out.
Built for My Free DaVinci Resolve Powergrade
These LUTs are designed to slot straight into the LUT node of my free DaVinci Resolve Powergrade. If you haven't got it yet, you can download my free Powergrade here. It gives you a full node tree with a colour space transform in and out, plus nodes for exposure, white balance, contrast and saturation, and a node labelled LUT right at the end after CST OUT.
Once the Powergrade is installed, just drop CINE, CINE WARM or BAHA onto that LUT node and you're done. If you want to know why I build my grades this way, have a read of why a Powergrade is the smartest way to start colour grading in DaVinci Resolve.
A Creative LUT, Not a Conversion LUT
One thing worth knowing: these are creative LUTs, not conversion LUTs. They won't turn your log footage into Rec.709 on their own. Use them after your colour space transform, like in my Powergrade, or on footage that's already in Rec.709. You can use them in any grade you like, they just need to sit at the end of the chain.
How to Install the LUTs in DaVinci Resolve
Open Project Settings (the cog in the bottom right, or Shift + 9) and go to Color Management.
Scroll down to Lookup Tables and click Open LUT Folder.
Create a folder called Ben Kapur LUTs and copy the three .cube files into it.
Back in Resolve, click Update Lists, then Save.
On the Color page, open the LUTs panel and drag your chosen LUT onto the LUT node in the Powergrade.
The full step by step guide is included as a PDF in the download. If a look feels a little strong on your footage, select the LUT node, open the Key palette and lower Key Output Gain to blend it back.
Final Thoughts
I'm really happy with how these have come out. They're the same looks I use on my own client work, automotive films and landscapes, and I hope they save you some time in the grade. I'll be putting out a YouTube video on them very soon, so keep an eye out for that.
A good grade always starts with good footage. When I'm out filming, my NiSi filters are always in the bag, and if you want to build your own kit, my code Kapur-discount saves you money at nisioptics.co.uk.
Which look is your favourite? Let me know over on Instagram @benkapurphoto.
Useful Links
Get the Cinematic LUT Pack: benkapur.com/shop
My FREE DaVinci Resolve Powergrade: benkapur.com/my-free-powergrade
NiSi Discount Code: Kapur-discount, usable at nisioptics.co.uk
Follow along: www.benkapur.com | Instagram and Facebook @benkapurphoto
